Decide: The High-Payoff Target List
The decide function starts the targeting process. It translates the commander's intent into priorities and engagement guidance.
At the end of the third page you will see all three products together on one worksheet, the way a fire support cell actually keeps them.
Two kinds of targets
Before you can build a target list, you must understand two terms:
| Term | Meaning | Whose mission? |
|---|---|---|
| High-value target (HVT) | A target the enemy commander needs to accomplish his mission. | Enemy's mission |
| High-payoff target (HPT) | A target whose loss will significantly contribute to the success of our mission. HPTs are chosen from the HVT list. | Our mission |
The S-2's list of eight enemy elements in the scenario is the HVT list. Your first job is to decide which of those HVTs are HPTs — the ones worth spending our limited sensors and ammunition on, because attacking them directly helps us seize the bridge.
The eight enemy elements — the HVT list
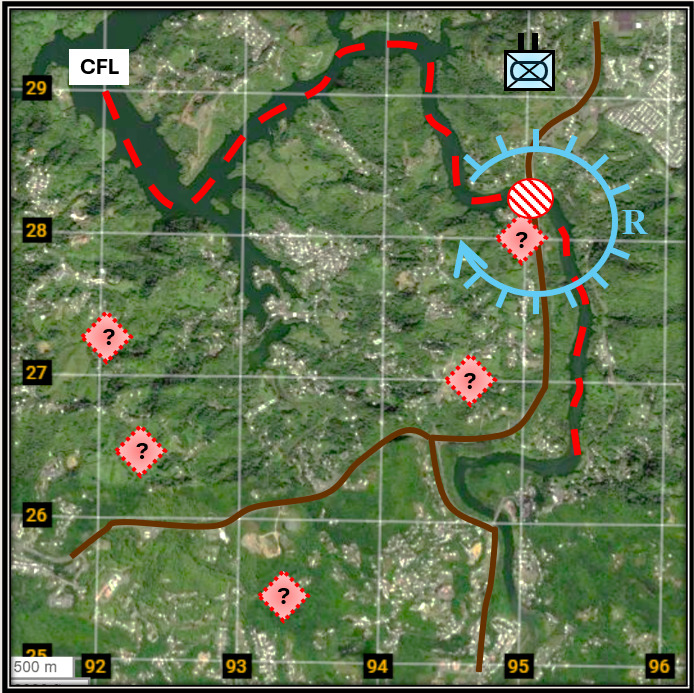
All eight elements from the S-2's list are shown on the map. The map does not tell you which ones are high-payoff targets. That is your decision in the tasks below.
Known to exist — location not established
| Ref | Element | Where it sits |
|---|---|---|
| 1 | Ammunition supply point | Well to the rear, 6 km behind the river. Holds the mortar and ATGM ammunition. |
| 2 | ATGM section | Dug in on the high ground overlooking the crossing. |
| 3 | Field kitchen | Furthest back of all, with the rear-area trains. |
| 4 | Engineer obstacle team | On the bridge itself. |
| 5 | Battalion command post | In the treeline, 4 km behind the river. Relocates every 24 hours. |
| 6 | Logistics trucks | Move along the road at night between the supply point and the fighting positions. |
| 7 | Reconnaissance squad | The only enemy element on our side of the river. |
| 8 | 120 mm mortar platoon | Deepest of the fighting elements, but still close enough to reach the bridge. |
Task 1.1 — Nominate the High-Payoff Targets
NOT DONEReview the commander's guidance on the Scenario page. From the S-2's HVT list, select the elements that should become HPTs. Remember: ammunition is limited, the attack is in 48 hours, and every mission must serve the plan to seize the bridge intact.
Task 1.2 — HVT or HPT?
NOT DONEThe enemy infantry platoon holds prepared positions beyond the bridge and will fight our assault force. Why is it an HVT but not an HPT in this operation?
Task 1.3 — Build the High-Payoff Target List (HPTL)
NOT DONEPut the five HPTs in priority order using the ▲ and ▼ buttons. Everything you need is in the commander's guidance:
Reminder — Brigade Commander's Guidance
“My intent is to seize the Kordan bridge intact and cross before the enemy can react. To do that, fires must accomplish three things:
- Protect the bridge — stop the enemy engineers before they can drop it.
- Disrupt enemy indirect fire — do not allow the enemy to use mortars on friendly units as we are forced to concentrate near the bridge.
- Disrupt enemy command and control — there is a significant risk the enemy will request indirect artillery fire or reinforcements when he learns friendly forces are concentrated near the bridge. We must disrupt his command and communications network to mitigate this risk.
Nothing may be allowed to stop a vehicle on the span. A single burning vehicle on that bridge and we have done the enemy's demolition for him — we will have seized a crossing we cannot cross. The ATGM section is the only thing in his order of battle that can do that, and it is already laid on the crossing. The ATGM team must not be able to affect my vehicles as they cross that chokepoint. Ammunition is limited — every mission must serve this plan.”
His three requirements are already in priority order — but you have four targets, and the fourth is not simply added to the bottom. Read the last paragraph again and ask which losses would end the mission, and which would only hurt.
- 1Battalion command post
- 3Engineer obstacle team
- 4ATGM section
- 5120 mm mortar platoon